How Much Fencing Do You Need? Posts, Panels, Concrete, and Stain
Work out how much fencing you need by calculating posts, panels, concrete, and stain before you order materials, dig holes, or come up short.
Measure the perimeter, not your patience
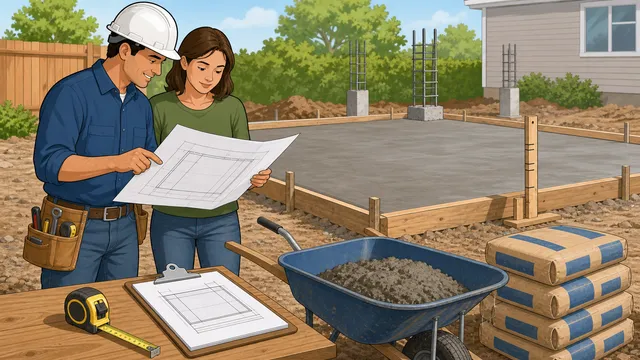
I have built more fences than I can count — privacy fences, picket fences, stockade fences, post-and-rail for a hobby farmer who kept losing goats. And if you are trying to work out how much fencing you need, the mistake I see most often from DIYers is the same one every time: they drive to the timber yard or home centre with a vague idea of how long the boundary is, buy what looks like roughly the right amount of materials, and end up either short by three panels or drowning in leftover concrete. Neither is fun.
A fence is one of the most satisfying DIY projects you can take on. You start the morning looking at an open boundary and end the day with a proper structure. But getting the materials right before you start is everything. Running out of post-mix concrete on a Saturday afternoon when the merchant has closed is the kind of mistake that adds a week to a one-day project.
This guide walks you through calculating exactly what you need — posts, panels, concrete, and stain — so you order once, build once, and do not lose a weekend to undersupply.
Before you sink the first post, check your local fence rules, confirm the boundary line, and have underground utilities marked where that service exists. If the fence is unusually tall, carries a heavy gate, runs along a retaining edge, or sits in an area with severe frost or high winds, get local advice from a fence contractor, inspector, or building department. A quantity calculator is useful. It is not a substitute for site judgment.
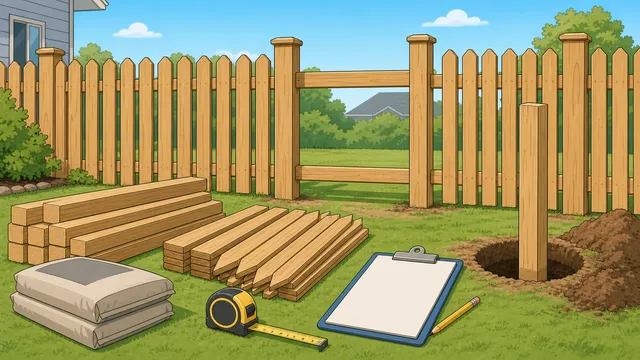
How many fence posts and panels do you need?
Before anything else, you need three measurements: the total length of fence you are building, the height you want, and the spacing between posts (which is usually determined by your panel width — standard panels are 1.83 metres or 6 feet wide).
Walk the perimeter with a tape measure. Include every straight run and note where you need gates. Gates require their own posts, and the opening width determines the gate panel size. If your boundary is not straight, break it into segments and measure each one.
A few things people forget: you need a post at every corner and every end point, not just at panel intervals. Gates almost always need heavier thought than an ordinary run because the hinge side carries far more stress. If you are running along a neighbour’s boundary, confirm the line before you dig — boundary disputes over a fence that is six inches on the wrong side are remarkably common and remarkably unpleasant.
Let’s use the Fence Calculator to work out your posts, panels, and materials.
Quick layouts
Planning assumptions
Total fence length includes gate openings. Gate width is subtracted from picket and rail coverage, then each gate adds two gate posts and one hardware kit.
Post count
15 posts
12 fence sections across 96.00 ft of fenced run after 4.00 ft of gate openings.
- Rails to order
- 40
- Pickets to order
- 212
- Concrete bags
- 28
- Estimated material cost
- $2,053.00
- Fasteners
- 1,344
- Gate hardware kits
- 1
How to use this result
Use the post count, waste-adjusted picket count, rails, fasteners, and concrete bags as a framing baseline, then adjust for sloped runs, unusual gates, corner bracing, end conditions, and product-specific post or rail detailing before ordering.
Suggested post length
8.50 ft
Cost per ft
$20.53
Concrete volume
16.29 cu ft
Waste-adjusted run
105.60 ft
Once you have the output, do not stop at the base count. Check whether the run includes:
- corners or returns that change the post count
- one or more gates needing dedicated hinge and latch posts
- sloped ground that may force stepping or custom trimming
- obstructions such as trees, walls, drains, meter boxes, or service routes
That is why I rarely order the exact bare minimum. Add a realistic waste and adjustment allowance, especially for rails, boards, and fixings. Panels can arrive damaged, posts can twist, and one awkward corner can burn through the spare board you wish you had ordered. For many domestic jobs, adding roughly 5% to 10% on breakable or cut-to-fit materials is far cheaper than losing half a day to one missing part.
How much concrete do your post holes need?
Every fence post needs to be set in the ground solidly enough to resist wind load, which means concrete or another approved footing system. The amount of concrete per post depends on the hole diameter, hole depth, and the post size. A common rule of thumb is a hole roughly three times the width of the post and at least one-third of the total post length deep, but local frost depth, soil conditions, and fence height matter just as much. For a 2.4-metre (8-foot) post that will stand 1.8 metres above ground, you are often looking at roughly 600mm in the ground as a starting point, not an unbreakable rule.
This is where people most frequently under-order. A single post hole uses more concrete than you think — typically one to two bags of post-mix per hole, depending on the hole size. Multiply that by twenty or thirty posts and you are looking at a serious pile of concrete bags.
Use the Post Hole Concrete Calculator to get an accurate quantity.
Result
2 80-lb bags
Total bags of concrete needed for 1 post.
- Total volume
- 0.87 cu ft
- Volume per hole
- 0.87 cu ft
- Concrete weight
- 130.29 lb
How to use this result
Round up to whole bags, then keep a little margin for hole irregularity, post-centering, and any extra mix needed at the bottom of the hole.
When you read the result, translate it into ordering reality. Bag count is only part of the question. You also need to know whether your corner posts, end posts, and gate posts should be oversized compared with the middle runs. They often should. Competitor guides hammer this point for a reason: a nice clean average per hole can understate what the most heavily loaded posts need.
Also think about drainage and frost. In colder climates, posts often need to sit below the frost line or they can heave and lean. Many installers also use a gravel layer at the bottom of the hole for drainage before concrete goes in. If your ground is soft, wet, or highly expansive, do not assume the standard detail is enough just because the calculator gave you a tidy bag count.
Quick tip from years on job sites: fast-setting post-mix concrete can keep a small fence job moving, but only if you stay disciplined about line, level, and bracing. Fast set is not magic. It simply means you have less time to correct a crooked post.
How much stain or treatment should you buy?
A new timber fence looks great for about six months before the weather starts turning it grey. Staining or treating the wood protects it from moisture, UV damage, and rot, and can double the lifespan of the fence. The time to stain is as soon as the wood is dry enough to absorb the product — usually two to four weeks after installation for fresh timber.
The amount of stain you need depends on the total surface area of the fence (both sides if you want full coverage, though most people only do the visible side) and the coverage rate of your chosen product, which is printed on the tin.
Use the Fence Stain Calculator to estimate how much stain or preservative to buy.
Order volume
17.60 gal
4 containers for 1,200.00 ft² of fence board area across 2 coated sides.
- Board area
- 1,200.00 ft²
- Adjusted coverage area
- 2,400.00 ft²
- Container count
- 4
- Estimated coating cost
- 192.00
How to use this result
Use the order volume as a buying baseline, then compare it with the product label and the real fence construction. Pickets, rails, posts, and rough timber texture can all change real stain use.
Now compare the result with the actual product sheet, not just the front of the tin. Manufacturer coverage ranges are usually broad because smooth timber, rough-sawn timber, old dry wood, and weathered wood all absorb differently. Behr’s house-and-fence stain guidance, for example, gives a wide first-coat coverage range and explicitly notes that substrate porosity changes yield.
Rough-sawn timber absorbs significantly more stain than planed timber. If your panels are rough-sawn, weathered, or particularly thirsty, budget from the conservative end of the coverage range and expect the first coat to disappear faster than you think. Under-ordering stain mid-project means you might not get an exact colour match from a different batch, which can leave visible variation.
What catches people out after the materials are delivered?
The calculators get you to the gate. Site reality gets you through it.
The most common problems I see after delivery are:
- Uneven ground: a fence can be stepped or raked, but the material count and cut list change. Do not assume every run takes a full standard panel untouched.
- Heavy gates: hinge posts often need deeper footings, stouter posts, and better hardware than a plain line post.
- Wet ground or poor drainage: this affects hole depth, gravel use, and post durability.
- Code and neighbour issues: maximum fence height, front-garden rules, and shared-boundary etiquette vary more than people expect.
- Fixings and hardware: galvanised or stainless screws, brackets, hinges, latches, and post caps are easy to forget because they are not the glamorous part of the order.
That is why a decent order list includes more than posts, panels, and mix. It should also include fixings, rails or boards if you are stick-building, gravel if your method uses it, gate ironmongery, preservative or stain, and at least one small allowance for waste.
Building tips from too many fences
Once your materials are on site, here are the lessons that come from doing this work day in, day out:
Set your end and corner posts first. String a line between them at the top to give you a straight reference for all the intermediate posts. A fence that wanders even slightly is visible from a distance, and once the concrete is set, you are not moving those posts.
Check every post with a spirit level. Plumb in both directions before the concrete sets. A post that is 10mm out of plumb at the base will be 30mm or more out at the top, and every panel it connects to will show the error.
Leave a gap at the bottom. Unless you are building specifically for animal containment, leave 25 to 50mm between the bottom of the panels and the ground. This prevents moisture wicking up into the panel timber and extends the life of the fence considerably. It also makes mowing along the fence line much easier.
Use galvanised or stainless fixings. Standard steel screws and brackets will rust within a year in outdoor conditions, leaving orange stain streaks down your freshly treated fence. Spend the extra on galvanised or stainless hardware. It is a small cost relative to the project and saves you from having to replace fixings in two years.
Order everything at once. Delivery charges from a builder’s merchant are the same whether you order ten panels or thirty. One delivery with everything on it costs less and wastes less of your time than three separate trips for things you forgot.
A well-planned fence goes up quickly, looks sharp, and lasts a decade or more with basic maintenance. The key is in the preparation: measure the real run, check the boundary and utilities, use the calculators to build a proper materials list, then sanity-check the results against your site conditions before you order.
If you are still unsure after that, especially around footing depth, gate loading, or local rules, get a local pro to review the plan before you dig. Measure twice, cut once is fine. On fence work, I would add: call once, check once, and pour once.
Calculators used in this article
Construction / Fencing
Fence Calculator
Estimate fence posts, rails, pickets, gates, fasteners, concrete bags, and cost from fence length, post spacing, waste allowance, and picket layout choices.
Construction / Fencing
Fence Stain Calculator
Estimate stain or sealer quantity for a fence from fence size, coating sides, coverage rate, coats, and waste allowance.
Construction / Concrete & Masonry
Concrete Calculator
Use this concrete calculator to estimate cubic yards, cubic metres, and bag counts for slabs, footings, and columns, compare common thickness checkpoints.