How Much Lumber Do You Need to Build a Backyard Deck?
Estimate deck boards, stain coverage, and lumber volume before you buy, so your deck build does not turn into three extra yard runs and a cost overrun.
Before you start buying deck lumber
I’ve framed out more decks than I can count — from little 10x10 platforms off a back door to full wraparounds with built-in benches and pergolas. And the pattern is always the same. Somebody gets excited, buys a pile of lumber on a Saturday morning, and by Sunday afternoon they’re back at the yard buying more because they guessed wrong on quantities.
A deck is one of those projects where the planning stage pays for itself three times over. Get your numbers right before you cut a single board, and you’ll avoid the two things that kill every DIY build: wasted material and wasted trips.
This guide covers the material side of the job — how much decking you actually need, how to think about lumber in board feet, and how to figure stain coverage so you’re not left with a half-finished surface when the can runs dry.
What it does not do is magically turn a bad plan into a safe structure. In the US, deck rules around footings, guardrails, stair geometry, ledger attachment, and fasteners are local-code territory, not “close enough” territory. Use the calculators here to sort out quantities, then confirm the structure against your local permit office, inspector guidance, or a proper plan before you dig holes and start bolting things to the house.
How many deck boards do you actually need?
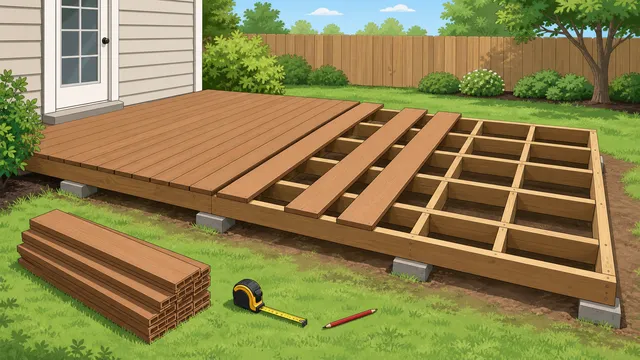
Start with the obvious: the size of your deck. Length times width gives you the total square footage of the deck surface. But that raw number isn’t how much lumber you need to buy. Here’s why.
Deck boards aren’t installed edge to edge. You leave a gap between them — typically 3/16 to 1/4 inch — for drainage and seasonal expansion. That gap eats into your coverage. On top of that, you’ll have cuts at the ends of rows, boards that split when you drive the last screw near an edge, and the odd piece with a warp or twist that’s not worth fighting with.
My rule of thumb is a 10% waste factor for a simple rectangular deck and 15% if you’re doing a diagonal or herringbone pattern. Mitre cuts generate more offcuts, and angled layouts mean more of those offcuts are too short to use anywhere else.
The board dimensions matter too. A standard 5/4x6 pressure-treated deck board (which actually measures about 1 inch by 5.5 inches, because lumber sizing is its own special brand of confusion) covers a different area per linear foot than a 2x6 or a composite plank.
Use the Deck Board Material Calculator to dial in your quantities. Enter your deck dimensions and board size, and it’ll tell you how many boards to order:
Units and currency
Quick examples
Decking layout
Assumptions
The estimate assumes boards run along the deck length unless you choose a diagonal or complex pattern. Diagonal layouts add 15 percentage points of waste; complex patterns add 20 percentage points. Fasteners assume joists cross every board row.
Order quantity
29 boards
26 rows across 192.00 ft², including 10% total waste after layout adjustment.
- Base boards before waste
- 26
- Pieces per row
- 1
- Ordered lineal
- 464.00 ft
- Width overage
- 5.25 in
- Fasteners with spare
- 744
- Picture-frame boards
- 0
Joinery and waste
0 field seams, 13 joist lines, and 3 extra boards added for trimming, layout waste, and damaged stock.
Estimated material cost
$696.00 total board spend.
Takeoff breakdown
- Field decking before waste
- 26 boards
- Required lineal material
- 416.00 ft
- Perimeter lineal material
- 0.00 ft
- Layout waste added
- 0%
How to use this result
Use the ordered board count as a purchasing number, then compare the field seams, perimeter boards, fastener count, and layout-waste adjustment against your supplier quote. Stairs, railings, fascia, and product-specific clips still need a separate check.
Write that number down and add a couple of extras. Lumber yards will take back full-length returns, but they won’t take back the board you cut two feet off of and decided you didn’t need.
The result is most useful when you treat it as an ordering baseline, not a final shopping list. Straight 12 x 16 deck with square corners and standard pressure-treated boards? Fine, stay near that calculator number plus your waste. Add a picture frame border, diagonal decking, wraparound stairs, fascia, or long runs where seam placement matters, and the real order climbs fast. Layout decisions create waste far quicker than first-timers think.
Board length matters as well. Sometimes paying slightly more for longer stock reduces seams, cuts, and waste enough to save money overall. Other times a mixed-length order is smarter because it lets you stagger seams cleanly without feeding half the deck into the offcut pile. The calculator gives you the quantity logic; you still need to think like someone who has to carry, cut, and hide the joins.
What does board foot pricing mean for deck lumber?
If you’ve only ever bought pre-cut studs and sheets of plywood, the term “board foot” might be new to you. Here’s the short version: a board foot is a unit of volume equal to a piece of wood that’s 1 inch thick, 12 inches wide, and 12 inches long. It’s 144 cubic inches of lumber.
Why does this matter for your deck? Because once you move beyond basic deck boards and start buying posts, beams, joists, and rim boards, many lumber yards — especially hardwood dealers — price stock by the board foot rather than by the piece. If you’re sourcing cedar or ipe for a premium deck surface, you’ll almost certainly be quoted a per-board-foot price.
The formula is straightforward: thickness (inches) times width (inches) times length (feet), divided by 12. But doing that calculation for every piece in your cut list gets tedious fast, especially when you’re dealing with nominal versus actual dimensions.
The Board Foot Calculator handles the arithmetic for you. Plug in your dimensions and quantity, and it gives you the total board footage:
Measurement basis
Quick lumber examples
Result
35.20 bf
Order target after 10% waste. The measured stock contains 32.00 bf before trim loss.
- Board feet per piece
- 8.00 bf
- Waste allowance
- 3.20 bf
- Total cubic feet
- 2.67 ft³
- Total cubic metres
- 0.08 m³
- Input stock volume
- 0.67 ft³
- Estimated material cost
- Add a price
How to use this result
Compare supplier quotes using the waste-adjusted board-foot order target. Keep the measured board-foot total for quote checks, and use cubic-volume figures when you also need a storage, freight, or workshop handling estimate.
Quick example: say you need eight 4x4 cedar posts at 8 feet each. That’s 4 x 4 x 8 / 12 = 10.67 board feet per post, or about 85 board feet total. At $8 per board foot for clear cedar, you’re looking at $680 just for posts. Numbers like that are exactly why you want to calculate before you commit.
This is where premium material choices stop being abstract. Cedar, redwood, hardwoods, and nicer trim details look terrific, but they change the budget quickly once you apply board-foot pricing to posts, beams, fascia, stair stock, and rail parts. If the number coming out of the calculator makes you wince, that is useful information now, before the yard forklift is loading your trailer.
It also helps you compare apples with apples. One supplier might price by the piece, another by board foot, and another by linear foot for surfaced stock. Translate everything back to the same unit before you decide one yard is “cheaper.” I have seen plenty of homeowners lose half a Saturday driving across town to save money they never actually saved.
How much deck stain or sealer should you buy?
Here’s the mistake I see constantly: someone builds a beautiful deck, stands back to admire it, and then “plans to stain it next weekend.” Next weekend becomes next month. Next month becomes next spring. By then the wood has greyed out, mildew has started creeping in, and the grain has raised enough that you need to sand before you can coat.
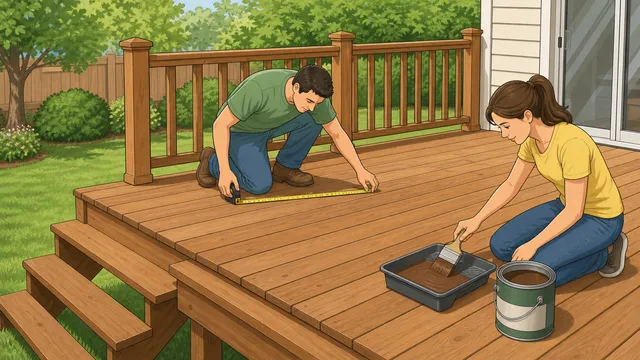
Stain or seal your deck as soon as the wood is dry enough to accept finish. For pressure-treated lumber, that’s usually four to eight weeks after installation — do a water drop test by sprinkling a few drops on the surface. If they bead up, the wood is still too wet. If they soak in within a couple of minutes, you’re good to go.
Now, how much stain do you actually need? Coverage rates vary by product and application method. A typical semi-transparent deck stain covers about 150 to 300 square feet per gallon on smooth wood, depending on how porous the surface is and whether you’re brushing, rolling, or spraying. Rough-sawn or heavily textured wood drinks up finish and will be on the lower end of that range.
Don’t forget to account for railings, stair treads, and the fascia board along the deck edge — they add more surface area than people realise. A 12x16 deck with railings on three sides can easily have 30 to 40% more stainable surface than the deck floor alone.
Use the Deck Stain Calculator to get your gallon count right:
Quick examples
Try a maintenance coat, a weathered family deck, or a rough deck with railings and other add-on surfaces.
Coverage guidance
A common deck-stain planning baseline for visible grain and moderate colour. Smooth boards usually spread farther than rough or weathered wood. If your product label gives a range, use the lower end for rough timber and add-on surfaces like railings or stairs.
Buy it all at once from the same batch. Stain colour can vary slightly between production runs, and if you run short and buy a second can six months later, the difference will show — especially on horizontal surfaces in direct sunlight.
When you read the result, think in coats and surfaces, not just gallons. Deck boards alone are one thing. Add top rails, balusters, stair stringers, risers, skirting, benches, and fascia, and the stainable area jumps. Rough, thirsty boards and end grain pull far more finish than the clean numbers on the tin suggest. If you are brushing it in properly instead of waving a sprayer around and hoping for the best, your real-world coverage will usually land toward the lower end.
And do not forget timing. New pressure-treated lumber often needs time to dry before coating, but “wait forever” is not the lesson. Test the wood, clean it properly, and stain when the moisture level and product instructions say you can. A deck left bare for a year does not become characterful. It becomes weathered, patchy, and more work.
What mistakes cause the biggest deck budget and safety problems?
After two decades in the trade, these are the errors I see most often on DIY deck jobs:
- Skipping the ledger board flashing. The ledger is the board that bolts to your house. Without proper flashing — a Z-shaped piece of metal that tucks under your siding and over the top of the ledger — water wicks into the wall sheathing and causes rot. This is the number one cause of deck failures I’ve been called to fix.
- Undersizing the joists. A 2x6 joist is fine for a short span, but once you get past about 8 feet, you need 2x8s or 2x10s depending on your joist spacing. Check your local building code or use the span tables from the AWC (American Wood Council). Don’t guess on structural members.
- Spacing footings too far apart. Posts carry the load down to your concrete footings. If the footings are too far apart, your beam sags and the deck feels bouncy. I space mine no more than 6 feet apart for a standard residential deck.
- Using the wrong fasteners. Galvanised nails and screws are the minimum for pressure-treated wood. Stainless steel is better if you’re using cedar or a hardwood, because the tannins in those species react with standard galvanising and create black stains.
I would add two more mistakes to that list. First, people cost only the visible decking and forget the hardware, concrete, structural connectors, joist tape, post bases, and delivery charges. Those “small” items can move a deck budget by a painful amount. Second, people design the deck they want without checking whether the site agrees. Slope, drainage, frost depth, attachment details, and setback rules all get a vote.
If your deck ties into the house, carries a roof or pergola, sits high off the ground, or needs stairs and guardrails, this is where DIY bravado should take a short tea break. Get the structure checked. The calculators are excellent for material planning, but they are not a permit set and they are not a substitute for local code.
What should you confirm before you place the order?
Before you hand the yard your card, make sure you can answer these without guessing:
- What material are you building with? Pressure-treated pine, cedar, and composite all change the board count, fastener choice, and finish plan.
- What is included in the order? Surface boards, fascia, stairs, railing stock, posts, beams, joists, hardware, concrete, stain, and waste.
- What board lengths make sense? Cheapest per piece is not always cheapest for the build once seams and waste show up.
- What does your local code require? Footing depth, joist spans, railing height, stair rise/run, and ledger details are all local-check items.
- How are you protecting the deck long term? Water management, flashing, correct fasteners, and a realistic staining plan matter just as much as the pretty top boards.
If those answers are solid, the project usually runs smoothly. If they are fuzzy, that is the time to slow down, not speed up.
The bottom line
A deck is one of the best return-on-investment projects you can do to a house. It extends your living space, looks great, and a well-built one lasts 20 to 30 years with basic maintenance. But “well-built” starts with “well-planned.” Run your numbers through the calculators above, order the right quantities, and you’ll spend your weekends building instead of running back to the lumber yard.
Calculators used in this article
Construction / Deck & Patio
Deck Board Material Calculator
Estimate deck boards needed, lineal footage, seams, fasteners, picture-frame boards, waste, and board cost from deck size, board width, gap spacing.
Construction / Deck & Patio
Deck Stain Calculator
Estimate deck stain or sealer volume, finish-type coverage rate, container count, leftover stain, and product cost from deck floor area, add-on coated surfaces.

Construction / Framing & Carpentry
Board Foot Calculator
Calculate board feet, waste-adjusted lumber order quantity, optional price per board foot, cubic volume.