How to Estimate Materials for a Full Room Renovation
Estimate drywall, paint, flooring, and carpet in the right order so your room renovation stays on budget and does not stall halfway through.
The mistake that costs you a second trip to the hardware store
I renovated my 1920s bungalow one room at a time over about three years. Bedroom first, then the kitchen, then the living room, and finally the bathroom that had been held together by optimism and caulk since the Nixon administration. By the time I got to that bathroom, I had the process dialled in. But early on? I made every rookie mistake in the book.
The worst one — and I see other people make it constantly — is guessing at material quantities. You eyeball the walls and throw six sheets of drywall in the truck. You grab two gallons of paint because the room “isn’t that big.” You order flooring based on the square footage number you half-remember from the listing when you bought the place. Then you run short, make a second trip, and discover that the next batch of flooring is from a different production run with a slightly different colour. Now you’ve got a visible seam in the middle of your hallway.
This guide is the process I wish someone had handed me before that first bedroom. We’ll work through a full room renovation in order — drywall, paint, and flooring — with a calculator for each stage so you get real numbers instead of guesses.
One important boundary before we start: this is a material-planning guide, not a free pass to ignore what is behind the walls. If the room has suspect wiring, water damage, structural movement, old textured coatings, or pre-1980s paint and finishes, stop and check what you are disturbing before you start tearing things apart. A room makeover gets expensive very quickly when demolition uncovers a problem you should have identified first.
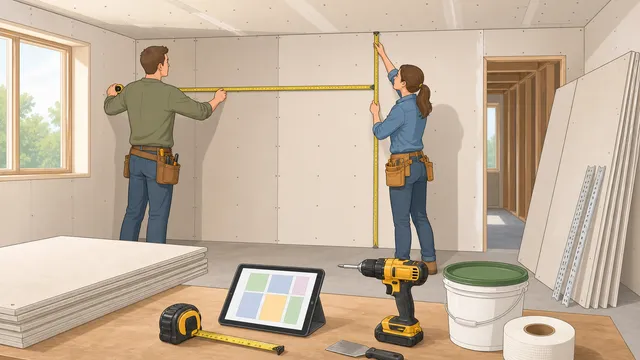
How much drywall do you need for one room?
If you’re doing a full renovation, there’s a good chance some or all of the drywall needs replacing. Old plaster walls in pre-war houses are notorious for hidden damage — pull off one section of wallpaper and suddenly you’re staring at crumbling lath. Even in newer homes, water damage or previous bad patch jobs can mean it’s faster to tear out and start fresh.
Here’s what you need to know before ordering:
- Measure every wall surface that needs new board. Height times width for each wall, then add them together.
- Subtract door and window openings — but only the openings, not the trim area. You’ll be cutting drywall around those openings and the offcuts usually end up in the skip.
- Pick the right thickness: 12.5mm (half-inch) for most walls, 15mm (five-eighths) for ceilings and anywhere you want extra fire resistance or sound dampening.
- Standard sheet sizes are 1200 x 2400mm (4 x 8 feet). Larger sheets mean fewer joints to tape, but they’re heavy and awkward in tight spaces.
A common trap is forgetting to account for waste from cuts. You’ll lose material at every corner, every outlet cutout, and every window frame. Budget at least 10% extra — more if the room has an unusual shape or lots of openings.
Use the Drywall Calculator to get your sheet count right:
Units and currency
Quick examples
Input mode
Result
17 sheets needed
15 base sheets plus 2 waste sheets for 477 sq ft of drywall surface.
- Net surface area
- 477 sq ft
- Ordered coverage
- 544 sq ft
- Opening deduction
- 51 sq ft
- Joint tape
- 191 ft
- 1 roll(s) at 250 ft
- Joint compound
- 5.4 gal
- 2 4.5-gal bucket(s)
- Screws
- 680
- Planning rate: 1.25 per sq ft ordered
- Corner bead
- 4 pieces
- 32 ft from outside corners
- Sheet size
- 32 sq ft
- Larger sheets reduce seams but are harder to carry
Sheet-size guidance
Use 4 x 8 sheets for easier DIY handling, 4 x 10 or 4 x 12 sheets to reduce seams on taller or longer walls, and confirm moisture-resistant, fire-rated, or sag-resistant board where the room or code requires it.
The accessory quantities are planning estimates. Actual tape, mud, screws, and corner bead depend on layout direction, stud spacing, finish level, inside corners, offcut reuse, and installer method.
Once you have your sheet count, order your joint compound and tape at the same time. For every 30 square metres (roughly 320 square feet) of drywall, expect to use about 15 kilograms of compound for three coats. Buy paper tape, not mesh — paper tape is stronger at corners and less likely to crack down the line.
The calculator result is most useful when you treat it as a hanging plan, not just a shopping count. Fewer joints usually means a better finish and less mudding, so if the room layout lets you use longer sheets sensibly, that often pays for itself in labour and headaches. And if the room has loads of openings, soffits, odd returns, or built-ins, increase the waste allowance rather than pretending every offcut will become a useful patch somewhere else.
How much paint should you buy for a room renovation?
After the drywall is hung, taped, and sanded, it’s time for paint. This is where most DIYers make their second big mistake: underbuying. Two coats over fresh drywall eats paint. The paper facing absorbs the first coat like a sponge, which is why a dedicated primer coat (or a high-quality paint-and-primer product) is non-negotiable on new board.
Here’s the formula: one litre of paint covers roughly 10 to 12 square metres per coat on a smooth surface. On fresh drywall, expect closer to 8 square metres for the primer coat. Textured surfaces use even more.
Things people forget to include in their paint calculation:
- Ceilings — if you’re painting them (and you should if the room has new drywall), that’s the entire floor area added to your wall area.
- Closet interiors — they’re part of the room and they need paint.
- Two coats minimum for the topcoat, on top of your primer. Three coats if you’re going from a dark colour to a light one.
Let the Paint Calculator give you a proper quantity:
Buy all your paint at once, from the same batch. Even the same colour formula can shift slightly between batches. If you need six tins, buy seven. Leftover paint stores well in a cool place and is useful for touch-ups down the road.
And remember that the paint number only means something if the prep is honest. Fresh drywall needs primer. Patched walls usually need more sanding and spot-priming than people expect. Dark-to-light colour changes often want an extra coat. If the calculator says you are right on the edge between two quantities, buy the larger amount and keep your blood pressure down.
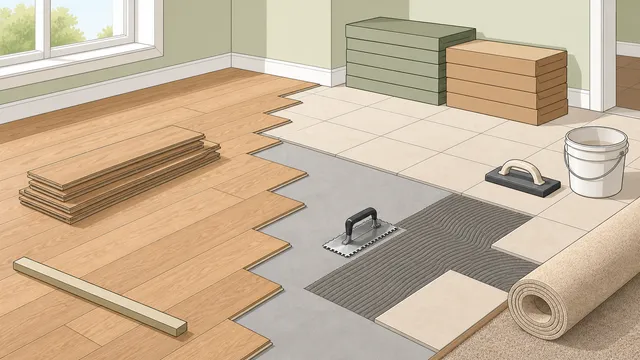
How much flooring should you order?
With the walls finished, you can move to the floor. Whether you’re laying hardwood, laminate, vinyl plank, or engineered timber, the estimation process is similar — but the waste factors are different.
Key considerations:
- Room shape matters: a simple rectangle wastes less than an L-shaped room or a room with alcoves, bay windows, or angled walls.
- Plank direction: running planks lengthwise in a narrow room looks better but can generate more waste at the ends if the room length doesn’t divide evenly by the plank length.
- Stagger requirements: most manufacturers require at least a 300mm (12 inch) stagger between end joints in adjacent rows. Short offcuts from one row can’t always start the next row.
- Waste allowance: 10% for a straightforward rectangular room, 15% for complex layouts, and up to 20% if you’re running planks at a 45-degree angle.
One thing that catches people off guard is the difference between the nominal coverage on the box and the actual usable coverage. A box that says it covers 2 square metres assumes zero waste. In reality, you’ll use a bit more.
Run your numbers through the Flooring Calculator before you order:
Quick examples
Order all your flooring from the same batch — same advice as paint, same reason. Production runs vary, and a colour mismatch in the middle of your floor is painfully obvious.
The number coming out of the calculator should also shape how you stage the renovation. Flooring rarely wants to be the first thing into a room. If plaster dust, paint splatter, or repeated ladder traffic are still in your future, protect the material properly or leave it in the box until the messiest work is done. Good estimating includes not just how much to buy, but when the material should actually hit the room.
How do you estimate carpet for one room?
If you’re carpeting instead of (or in addition to) hard flooring, the estimation is a bit different. Carpet comes in rolls of a fixed width — usually 3.66m (12 feet) or 4m (roughly 13 feet) — and you need to plan your seam placement carefully.
Things to account for:
- Roll width versus room width: if your room is wider than the roll, you’ll need a seam. Place seams in low-traffic areas and away from doorways where they’ll get kicked.
- Pile direction: all pieces must run the same way, or the carpet will look like two different colours where the seams meet. This limits how you can rotate offcuts.
- Pattern matching: patterned carpet needs extra material to align the pattern at seams, sometimes 10-15% more.
- Doorways and closets: these small areas still consume full-width carpet. A 1m x 0.6m closet floor still comes off a 3.66m-wide roll.
Use the Carpet Calculator to figure out how much you need:
Common carpet scenarios
How to read the roll result
Roll width matters: if the room is wider than the carpet roll, the calculator shows extra strips and seams so you can plan the layout before you order.
Waste allowance: the estimate already includes the percentage you enter for trimming, pattern matching, and offcuts.
Square yards: carpet is commonly quoted in square yards, so the calculator converts the total automatically.
Result
132 sq ft
Total carpet needed for a — x — ft room including —% waste.
- Room area
- 120 sq ft
- Square yards
- 14.67
- Linear feet of roll
- 13.2
- Roll strips
- 1
- Seams
- 0
- Waste amount
- 12 sq ft
- Seam count
- 0
- Roll check
- One width fits
Roll-width note
The room fits within one roll width, so no width-based seam is needed.
Material planning
If the room is wide, the strip count gives you a seam estimate before you visit the showroom or price the fitting job.
Estimated total cost
Add price per sq ft to estimate cost
Formula used
Sq ft needed = room length × room width × (1 + waste%)
How to use this result
Use the square-foot total as your ordering baseline, then compare it with the carpet roll width and seam count before you buy. If the room is wider than the roll, the calculator shows how many strips are needed so you can plan seams and cuts in advance. For patterned carpet, the final order may need more waste than this estimate.
Don’t forget underlay. Most carpet installations need it, and it’s sold by the square metre. Match your underlay to the carpet type — foam underlay for most domestic carpets, rubber or felt for heavy-duty options.
This is also where room shape and seam placement start to matter more than raw area. Two rooms with the same floor area can need different carpet quantities if one layout wastes a full strip at the doorway or forces an awkward seam. If the calculator result looks higher than your mental square-footage estimate, that is usually geometry being rude, not the tool being wrong.
How do you turn four calculator results into one renovation order?
By this point you should have four separate estimates, but the real job is combining them into one sensible order of operations.
- Confirm the room dimensions and the exact surfaces you are replacing, not just refreshing.
- Finalise drywall quantities first if any wall or ceiling work is happening.
- Calculate primer and paint from the finished wall and ceiling surfaces, including closets.
- Choose one floor finish path per area: hard flooring or carpet, not both for the same section unless the design really calls for it.
- Add your waste, consumables, and protection materials before you place the order.
That last line is where budgets usually blow out. Dust sheets, blades, sanding sheets, caulk, screws, patching compound, filler, underlay, transition trims, disposal, and delivery charges are rarely the glamorous line items, but they are the ones that make the card statement fatter than expected.
Pull it all together: your renovation checklist
Before you load up the truck or place your delivery order, run through this list:
- Drywall: sheets, joint compound, paper tape, screws (roughly 30 screws per sheet)
- Paint: primer, topcoat, rollers, tray liners, painter’s tape for trim and edges
- Flooring: planks or tiles, underlay or moisture barrier, spacers, transition strips for doorways
- Carpet: carpet, underlay, gripper rods, seam tape, knee kicker rental
The calculators above give you the core material quantities. The ancillary items — screws, tape, spacers — are cheap, so buy more than you think you need. Running out of painter’s tape mid-wall is annoying. Running out of drywall screws when the hardware store is closed is worse.
One last piece of advice: do not start demolition until every material is on site or confirmed for delivery. I learned this the hard way when I ripped out a bedroom floor on a Friday, expecting my flooring delivery on Monday. The delivery got delayed a week. I spent seven days stepping over joists in my socks. Don’t be that person. Get your materials sorted first, then start swinging the hammer.
And if the room renovation includes moving electrics, opening plumbing, changing layout, or finding anything suspicious once the old finishes come off, pause and bring in the right trade before you keep going. A tidy estimate is useful. A tidy estimate plus the wrong hidden assumption is how “quick room refresh” turns into “why is there a hole in my ceiling and a dehumidifier in the hallway?”
Calculators used in this article
Construction / Drywall & Paint
Paint Calculator
Estimate paint gallons, quarts, paintable wall area, and optional material cost from room dimensions, openings, coats, and coverage rate.
Construction / Drywall & Paint
Drywall Calculator
Use this drywall calculator to estimate Sheetrock sheets, measured area, waste, tape, joint compound, screws, corner bead, and optional sheet cost.
Construction / Flooring
Flooring Calculator
Estimate flooring square footage, net coverage area, planks, tiles, carpet square yards, roll length, box count, grout, thinset, waste.
Construction / Flooring
Flooring Calculator
Estimate flooring square footage, net coverage area, planks, tiles, carpet square yards, roll length, box count, grout, thinset, waste.